HousePlantJoy is supported by our audience. When you purchase through one of our links, we may earn a small affiliate commission. As an Amazon Associate I earn from qualifying purchases. Your cost is not affected.
==================
How to Make a Pine Cone Bonsai
Bonsai enthusiasts so love the craft of bonsai culture that it keeps them on their toes to create more. And among the challenges they face is choosing the best technique to create one and deciding the tree species. It’s no secret that creating a bonsai tree is not a walk in the park, and normally would take a long time, years, in fact, to see them in their full glory. Though how to make a pine cone bonsai could be challenging, it’s worth the experience.
Yet, the long years of waiting may be discouraging to many. But then the legacy of creating one and passing it on to the next generation is truly heartwarming. So, cheer up. The bonsai experience can also be a home-grown business or entrepreneurship. For the collector, he can get a unique and exquisite fully-grown bonsai tree, at a price of course. Then again, it’s all worth it as you become the proud owner of a one-of-a-kind bonsai tree.
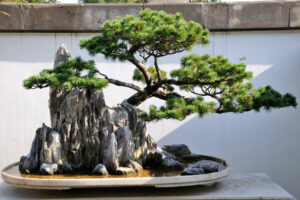
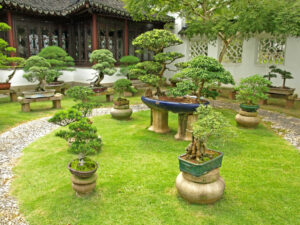
How to Make a Pine Cone Bonsai – Pine Bonsai in Nanjing, China
Whether you’re a newbie or an expert, a fanatic or a junkie, whoever you might be at this point, you may want to do the same. It’s all about the challenge, an exciting one. Now, with pine cones available online and in physical stores, you’ll have the first and most important bonsai element, the “star” in this article, the pine cone seeds to nurture as a future bonsai trees.
If you’ve reached this far, there may be a lot of things you’re eager to know. And the question that most people new to bonsai must be asking is “can you grow a bonsai from a pine cone?” And the next one is about pine bonsai care.
1 | Start with a good selection of the pine cones
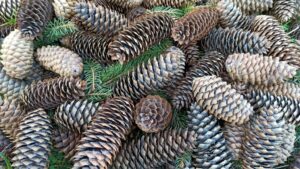
An effective method to create and grow pine cone bonsai tree is to go out and search for a healthy fine-looking pine tree. Pick up pine cones that have not opened and are not either green or mature either. You need to get several pieces. The reason for choosing a healthy and good-looking pine tree is that its cone would mostly likely grow and mature as beautifully as the mother tree it’s taken from. This is a significant step that shouldn’t be omitted in how to grow a pine bonsai tree from seed successfully.
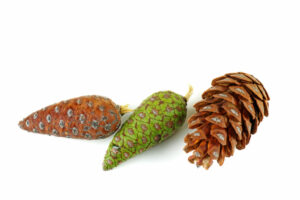
How to Make a Pine Cone Bonsai – a trio of cones
A cone that has opened means the seeds have already dispersed. On the other hand, a younger cone, usually greenish, would most likely not be mature enough to contain seeds. Gather more than one cone so you could grow more in one go. And it’s also a hedge against some cones not being suitable for bonsai culture.
2 | Preparing the pine cones and harvesting the seeds
Once you’ve gathered several perfect pine cones, here are the things to do:
-
Cleaning the cones…
At home, clean the cones by bathing them with water mixed with a small amount of lime sulfur to rid them of pests and fungi that might have infested them. Then put them outdoor to dry.
-
Drying the cleaned cones…
Next, place the cones on a soil sifter making sure they’re not touching or too close to each other. They need the space as they expand when they open up. Keep the cones dry to make them unfold faster. Also, don’t forget to place a cover on top to keep birds away.
Pine Cones
-
Picking up or taking out the seeds…
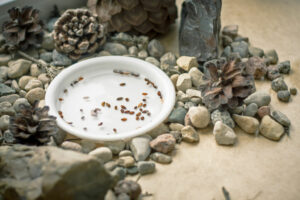
Wait until the cones turn brown and have opened up, which may happen within a week or two. Now, tap each pine cone lightly until the seeds come out. You’d notice that the seeds are attached to wing-like parts that would help disperse them in their natural habitat.
-
Stratifying the seeds…
To induce the seeds to sprout, the process of stratifying them would do the trick. Stratifying is creating the environment that induces them to sprout as though they’re in their natural habitat. Depending on some environmental factors and the quality of seeds, stratifying may be needed or not necessary. Stratifying the seeds may not work at all times, though.
-
Scarifying the seeds, another alternative…
Scarification is recommended when the seed’s coating is tough, which contributes a great deal to its inability to sprout. Therefore, to bring about germination, breaking the seed’s hard coating is required. Generally, seeds germinate when the right conditions are present. Such as the ideal temperature, oxygen, water, air, and sometimes even light and darkness.
So, depending on the type of seed, certain conditions stated above should be present to trigger its germination, if not they remain dormant. Some seeds have a hard coating so that in inhospitable weather conditions, germination is not going to happen. Or when germinating too early could endanger a weak seed.
-
Soaking the seeds in water…
So, here’s some helpful advice from renowned Bonsai expert, Jonas Dupuich. To stimulate the seeds to develop, they need to be soaked for about 24 hours in water. The good seeds will sink in no time. While inferior seeds will still be floating after a day indicating they are sterile. Jonas Dupuich also shared that he uses warm water to scarify seeds but found that they don’t always work. And it’s good that there are two options when scarifying the seeds is needed.
-
Planting the pine cone seeds in pots…
Plant the seeds in a small pot with soil fortified with minerals and organic plant fertilizer. Place them carefully on the top of the soil and cover them with a thin layer of soil or earth. Wait for two to three weeks for the seeds to grow into seedlings, or young trees. Also, keep the soil moist but not soggy.
We love alternatives just in case a procedure doesn’t work. And once again, we look to another technique from Jonas Dupuich regarding planting the seeds. Here’s how it’s done. He prepared a shallow pot filled with bonsai soil, his regular bonsai mixture of lava, pumice, and akadama, topped it off with sand. Then he watered the soil. After that, having a matchstick in one hand, he carefully poked the sand creating several neatly spaced holes about ¼ of an inch deep. Then, he planted pine seeds into each of the holes. Finally, he covered each hole with a tiny amount of soil and then watered the pot.
He also outlined a simpler version of his technique. That is, filling a container with bonsai soil, scattering the seeds into the soil, and finally covering the seeds with particles of fine soil. All these techniques will certainly come in handy in how to make a pine tree from a pine cone. This stage will eventually have the seeds grow into pine seedlings or pine sprouts, on its way to growing into pine saplings or young pine trees, each one ready to be potted in a separate container.
3 | Five Pine tree species for a Pine Cone Bonsai tree
Hundreds of different species fall under the Pinus genus. And many species of pine trees belong to the Pinaceae family, under the genus Pinus. There are numerous pine tree species, but only the four listed below are ideal for bonsai culture.
-
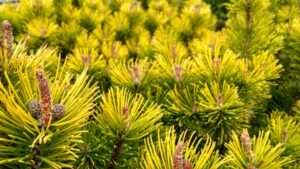
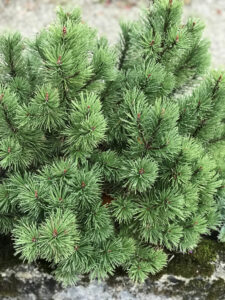
Mountain Pine (Pinus mugo):
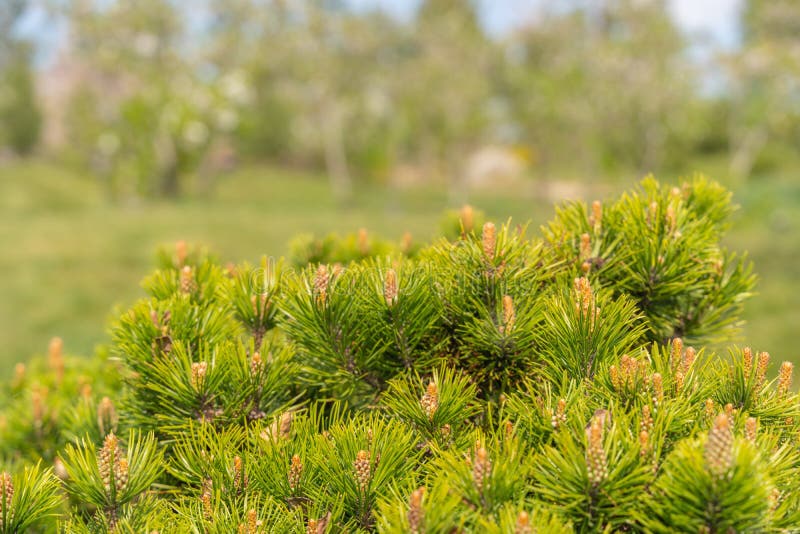
Pine cone trees growing in the wild.
This conifer, evergreen shrub has foliage of dark green needle leaves, about 3–7 cm (1.2–2.8 in) long, and nut-brown cones. Commonly referred to as the Mugo Pine.
-
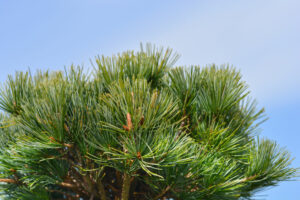
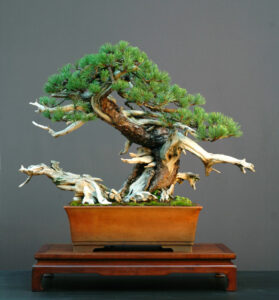
Japanese White Pine (Pinus parviflora):
Japanese White Pine (Pinus parviflora)
This tree is an evergreen with needled leaves and has a pyramidal shape typical of pine trees. Another coniferous evergreen for bonsai culture.
-
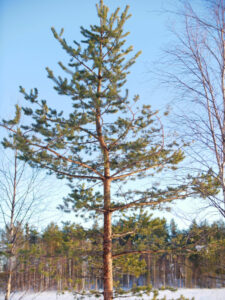
Scots Pine (Pinus sylvestris):
Scots Pine (Pinus Silvestris)
Also known as the Scotch Pine, it could be a bonsai plant if trained well. A twisting trunk and curvaceous twigs and branches make for an interesting bonsai plant.
-
Rocky Mountain Bristlecone Pine (Pinus aristata):
Rocky Mountain Bristlecone Pine (Pinus aristata
The Pinus aristata is a long-living pine also known as the Colorado bristlecone pine. It stands about 8 to 20 feet and with a width or spread of somewhere between 10 to 15 feet.
-
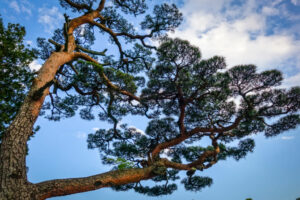
Japanese Black Pine (Pinus thunbergia)
Rocky Mountain Bristlecone Pine (Pinus aristata)
The leaves of this pine tree are bundled or clustered. It is a popular tree used for bonsai culture in Japan. Other names it is called are black pine, Japanese pine, and Japanese black pine.
4 | Creating a Pine Cone Bonsai tree from a pine cone
Now the pine cone seedling has developed into a young pine tree. It is ready to be transformed into a Pine Cone bonsai tree. It is ready to be nurtured into a Pine Cone bonsai tree. Listed below are the tools needed and materials.
Bonsai Tree: A young pine cone bonsai tree (pine bonsai tree), from 2 years to 4 years old
-
Bonsai pot
-
Soil mix for Bonsai
-
Bonsai wire
-
Pair of chopsticks, or similar like tongs
-
Concave cutter
-
Pruning Scissors
-
Drainage hole mesh cover
Step 01 Take the pine cone bonsai out from the pot
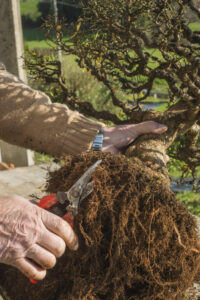
First, with care, take out the young pine tree plant from its nursery pot. Notice the root system has grown out under and on top of the pine cone.
Step 02 Shake off the soil to expose the roots
Gently wiggle the trunk to loosen the soil, with one hand on the tree trunk’s bottom. A skewer could be used to gently remove stubborn dirt or soil covering the root system. Some soil may be removed from the pot to help in the process. When out of the pot, gently remove the remaining loose soil using a pair of chopsticks. You just need to free the remaining soil clinging to the roots, until you see the main roots start to appear.
Step 03 Remove dead foliage and branches
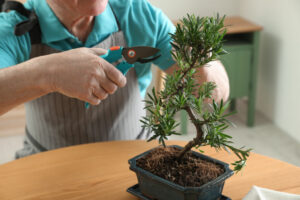
Next, using a pair of pruning scissors, cut away dead leaves, dead or rotting branches, and twigs. This step starts to reveal the basic shape and structure of the tree. Once you see this, you will have some ideas on how to design it to enhance its good points and make up for the not-so-attractive attributes.
Step 04 Create a sense of proportion
Here’s quite a tough part as you’d need to tap on your aesthetic sensibility. There has to be a pleasing proportion in the overall appearance of the young pine bonsai. It is advised that about 1/3 of the top of the tree should be removed. And that’s the crown where the branches, twigs, and leaves are. It’s an easy rule to be guided by. But then, use your judgment as this is just a general guide. Ask others, especially long-time bonsai experts, for their opinion and advice.
Step 05 Shape the pine cone bonsai tree based on your aesthetics
If you think the step before is challenging, read this one. Because at this point, you have to have a creative vision of what your young pine bonsai would or should look like. We encourage you to create drawings based on your imagination of how you’d like it to look. Go through books, videos, and online guides about bonsai trees. Then, based on what you imagine to be the best, start pruning away branches and the foliage. And stay close to the 1/3 limit to be trimmed off the crown.
Wiring the branches to shape the bonsai
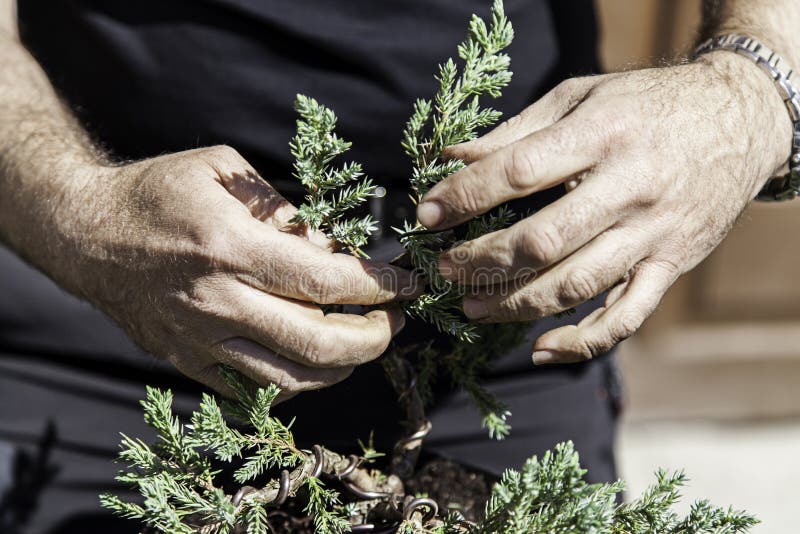
Step 06 Wire the pine cone bonsai tree to your desired shape
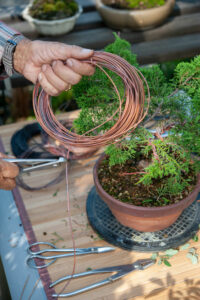
So, why must a bonsai tree trunk undergo reshaping? Growing a healthy bonsai pine tree necessitates shaping it with the use of wires. They are wrapped around the bonsai tree’s trunk to bend and reshape it to conform with the desired configuration. It’s like putting on dental braces to straighten crooked teeth to make your smile look the best.
Next, we need to learn how to wire a bonsai pine tree. First, secure the wire by digging the wire into the soil about a centimeter or more beside the trunk. Make sure the wire is strong, stable, and in place. Next, wrap the wire diagonally, like 45 degrees, around the trunk, while holding it in place with your free hand. The 45-degree angle of the wire’s placement would ‘make it resist vertical, horizontal, and diagonal forces. Make sure any excess wire from the top of the tree is cut away. Once the targeted shape is achieved, make small adjustments to refine it.
Step 07 Add character and drama into your bonsai tree configuration
The popular way to do this is to create a slight bending of the trunk which somehow adds a sense of drama but also action. It could reduce the height, but height is not a problem but an asset to a bonsai landscape. Being small, height should be an advantage and could work well with more than one bonsai specimen in a big pot.
Step 08 Next, wire to reshape the branches
With a thinner wire and starting at the lower branches, wire two branches at a time and secure them to the trunk for more stability and strength. Then, do the same to the upper branches until they’re all wired. To create a more defined apex for the bonsai tree, wire one or two branches in an upward position. Finish off by cutting away excess wire. As the branches are vulnerable to breaking, be careful and use both hands when executing this step.
Step 09 Review the shape of the bonsai tree
Now that the trunk and branches have been wired, continue refining the shape by going over and checking the bonsai tree, from the base to the top. Don’t forget to use one hand to make the adjustment while the other good hand is used to support and stabilize the manipulation.
Step 10 Prepare the bonsai pot
Next, prepare the pot for the bonsai tree by placing a mesh atop the drainage holes. Secure the mesh in place by making it bigger, around 3 inches minimum, than the diameter (round) or sides (square or rectangle) of the container.
Step 11 Transfer the bonsai tree into a new pot with soil
Using a pair of chopsticks, gently untangle the roots carefully. Cut off 1/3 of the roots, especially the longer ones. Put the bonsai soil and tamp it evenly. Transfer the bonsai tree into the new pot, putting in more soil. To get rid of air pockets, tamp it down gently with chopsticks or with a gloved hand.
5 | How to take care of a Pine Cone Bonsai tree
Pine cone bonsais are among the most challenging bonsai trees to create. Considered as one of the more advanced and difficult bonsai species to maintain, they’re for seasoned bonsai enthusiasts or professionals, and so they’re not recommended for beginners. It could be difficult to figure them out, and their necessities could be affected by atmospheric conditions or the climate. Below are four areas to focus on in caring for your bonsai trees.
Follow up on re-wiring your bonsai tree
Refer back to steps 6 to 9 about re-wiring. Although small versions of the regular trees, they do grow. And so minor re-wiring should be done to maintain its shape.
Aside from the aesthetic benefit, wiring the branches somehow spreads energy and positive vibes that benefit the whole bonsai tree. Care and common sense should be practiced when wiring the bonsai to avoid hurting and damaging it. Watch these videos and see how a Japanese bonsai expert does the wiring for his black pine bonsai tree, part 1 and part 2.
Light requirement
Do pine bonsai trees need a lot of sunlight? Generally, each species may have a different light requirement. However, any bonsai plant must have around 5 to 6 hours of sunlight every day. If this is not possible for some reasons, you should use grow lights.
Inside the house, locate a window that’s facing south. That’s the spot for placing your bonsai tree. If you don’t have a south-facing window, you may place your bonsai tree on a window that faces east or west.
Bonsai trees also need sunlight
For pine bonsai trees, receiving full or direct sunlight for several hours is best for their growth. So, you could let it stay in the sun in a spot in the garden that gets 6 to 8 hours of direct sunlight from 10 in the morning to 4 in the afternoon. To check if it’s not getting enough sunlight, inspect the needles. If they’re elongated, it needs more sunlight. Otherwise, the needles should be compact and short when enough sunlight is received.
Soil requirement
Your pine tree bonsai should have a pot that drains well. And the right soil for your pine tree bonsai should have all the nutrients it needs. To make sure they’re getting all they need, mix the soil with bonsai soil or mixes that are available commercially. They provide a combination of organic potting compost, fine gravel, pumice, and “akadama,” a granulated clay sourced from Japan. The akadama is one of the soil mixes those professional bonsai enthusiasts include in their bonsai pine soil.
Water requirement
How often do you water a pine bonsai tree? Check the top of the soil, an inch or two inches with a wooden stick, or just dig a small hole and see if the soil is dry. If it is, then you can safely water the pine bonsai tree. They thrive in moist soil but cannot endure water-logged pots. The reason: a flooded or waterlogged pot decreases the oxygen in the soil
Temperature and Humidity
Pine bonsai trees do well if given misting regularly, especially when the place is not humid. And it is not advised to grow them indoors. So, let them grow outdoors. Although pines are sturdy by nature, able to tolerate frost, place them in a safe, protected spot to shield them from the harsh winter weather.
Pruning Pine Cone Bonsai Trees
The pine tree’s growth pattern can be described as getting taller at its top, or apex. Therefore, pine trees grow upwards and outward along their side, horizontally. That means as a bonsai tree when left to grow without pruning, will eventually be full at the top, and become disappointingly top-heavy. To describe it plainly, it’s growing out of proportion and becomes less beautiful to look at. Not exactly what you’d expect a bonsai pine tree to look like. So, that’s a pretty convincing argument to show the importance of regular pruning to make your bonsai pine tree look its best always.
How to Make a Pine Cone Bonsai – Pruning
Potting and repotting
A pine bonsai, depending on how old it is, may need to be repotted every 2 to 5 years. It’s not yearly or regular repotting. The benefit is to refresh the soil, and to prune the root to keep the tree from being root-bound.
So, the container or pot should be chosen well. And here are a few guides in doing that. The height and width of the container shouldn’t exceed two-thirds of the tree. It’s not exclusively for design and aesthetic consideration. It is to restrict or prevent the root to grow out of proportion, like occupying most of the pot. However, there are no restrictions on following bonsai’s traditional rules.
Pine Cone Bonsai Tree Pests and Diseases
Your pine tree bonsai is among your treasured possession and thus you need to protect it from pests and diseases to which they may be vulnerable. Rotting roots and a number of several fungal diseases can develop. But you can prevent these from happening by practicing recommended watering procedure and preventing over-watering.
Aside from fungal diseases and root rot, insects can also affect bonsai trees such as aphids, caterpillars, and spider mites. Pine trees, especially the bonsai varieties, can be vulnerable to such diseases and perish. You may need to get help from plant disease experts to stop this from recurring. Appropriate and safe pesticides may be recommended. And remember that placing them where there’s lots of sunshine and taking really good care of them can’t be compromised.
Final thoughts…
Bonsai is an honored, centuries-old Japanese art of cultivating miniature trees in containers to replicate the full-sized tree’s scale and shape. Creating a pine bonsai from a pine cone seedling is one of the more popular. The Pinus family, to which the pine tree belongs, has around 100 species, so there’s a pine cone bonsai for everyone, from novice to expert. This tree is tough and versatile, and it responds well to trimming and training. Though hardy, the pine cone bonsai still requires a lot of attention, and its care differs slightly from other bonsai varieties.
When grown successfully, pine cone bonsais make arresting organic sculptural art pieces, and each one is a living art anyone would be amazed at. Now, if you already have the ideal pine cone, this project would be your own reward. Or possibly a present to a loved one. Begin to master the method, and how to make a pine cone bonsai, could be a good start. You’ll discover it’s not that difficult. So, on your next stroll in the woods, look out for good pine cones and get started on your project right away.
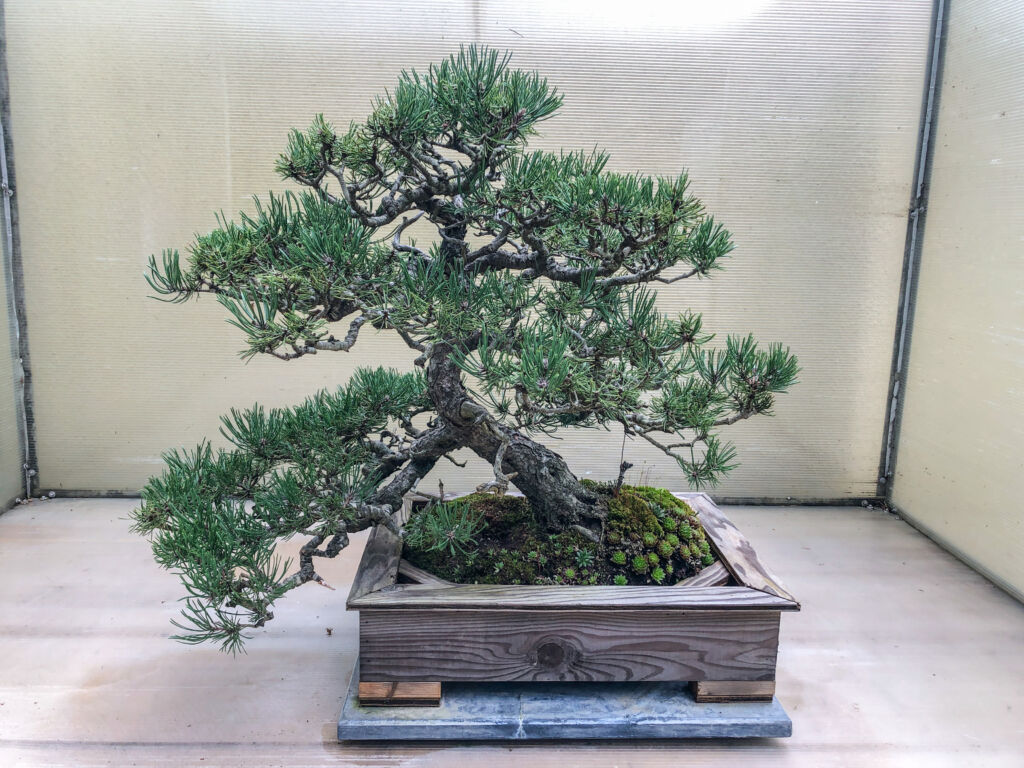
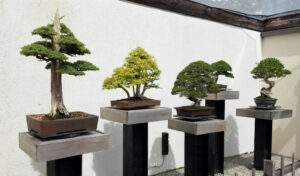
Bonsais on Display
If you’ve been inspired by and thrilled with the idea of growing your own pine tree bonsai and find the challenge worth a try, then we hope this piece has given you the right perspective and expectations. We would encourage you to learn more about pine cone bonsai. Or probably it has inspired you enough and would explore other types or species of bonsai trees that promise more possibility of success.
Read More:

