HousePlantJoy is supported by our audience. When you purchase through one of our links, we may earn a small affiliate commission. As an Amazon Associate I earn from qualifying purchases. Your cost is not affected.
==================
Embark on the journey of propagating ferns and growing ferns with our comprehensive guide on how to propagate Boston Ferns. Whether you’re a seasoned enthusiast or a beginner eager to enhance your space, these easy steps will walk you through the process of propagating ferns through division and fern runners. Soon, you’ll be surrounded by thriving Boston Ferns, carefully potted in nutrient-rich potting soil, creating a flourishing fern-filled paradise in your indoor haven or garden.
Let’s delve into the world of propagating ferns, discovering the art of division and fern runners, and witness your climbing ferns reaching new heights of greenery!
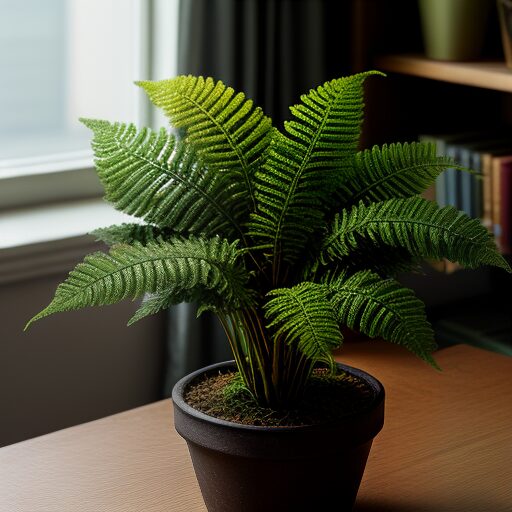
It is easy to propagate Boston ferns. The steps below will help you with the propagation of Boston fern so that you can add more greenery to your garden! Growing ferns like Boston are an excellent addition to any houseplant collection or garden. Boston ferns are among the easiest fern species to keep as houseplants since they don’t require much sunlight. As a result, their foliage looks beautiful and remains evergreen. The blue-green, sword-like fronds feature tiny leaflets that start to erect and arch with their growth.
Also known as sword ferns, they are widespread and abundant in tropical areas. However, Boston ferns are relatively slow-growing, like any other fern, so it is best to plant them in the spring or fall. Though it is easy to propagate Boston ferns, they take time and patience.
Below, you will learn how to propagate Boston fern and some valuable tips to keep it thriving.
Steps Showing How to Propagate Boston Ferns
If your plant is no longer producing leaves, its leaves are smaller than usual, or the fern center is dead, it’s time to propagate the fern. However, regardless of whether or not your fern is showing these signs, you should still divide Boston fern to encourage new growth. Moreover, whether you want to grow ferns indoors or outdoors, dividing them every three to four years is a good idea.
Propagation of Boston ferns is relatively easy, and there are various methods that you can use to grow more Boston ferns. For example, you may propagate Boston fern through Boston fern runners (Boston fern shoots) or divide the houseplant.
Before you divide your houseplant, it must consider proper root structure and the right time to grow your new divisions. Here is how to determine the root structure:
Water Generously
Before propagating your baby ferns to encourage optimal growth, ensure they are well-hydrated. Adequate watering is crucial because the ability of baby ferns to store moisture will be compromised for at least a week after propagation, affecting the root structure. So, propagate ferns generously by watering them for a few days before the growing process begins.
Looking for an effortless method to ensure your ferns absorb enough water while propagating?
Try placing them in a large bucket or tub, ensuring they fit without tipping over. Then, water thoroughly until some water drains from the bottom holes. After that, add a bit more water. This technique prevents drowning the roots and allows your climbing ferns to continue drinking as much as they need. This approach ensures optimal hydration for your chosen fern species without compromising their growth in the potting soil when propagating ferns.
Dig Up and Outdoor
To transplant young plants from the outdoors, employ a shovel for the task. Insert the shovel into the soil and move it away from the stems when digging up the young plants. Later, lift the fern by once again pushing in the shovel. This method is particularly useful when dealing with ferns that spread through creeping rhizomes. Take care to handle both the young plants and their parent fern with precision during the transplanting process.
Get the Fern Out of its Pot
Getting the new plant fern out of its pot may be challenging if planted indoors. In this case, gently grasp the fern leaves between your fingers and tip the pot upside down. Your plant should quickly drop out of its pot.
Rinse the Soil Off the Roots
Once your tiny plant’s houseplant is out of its pot, rinse the soil off the roots. Avoid tearing or ripping the tiny plants’ roots, and wash them gently with a low stream of water.
Examine the Roots, an Essential Step in Propagating Boston Ferns
Now, you can examine the roots to determine whether they are clumping or spreading. Depending on the structure of the root, there are multiple methods for dividing your Boston fern.
Rhizomatous roots are thick and have underground stems that grow small fibrous roots. Ostrich ferns usually have rhizomatous roots. If you see a mass of fine, fibrous roots after washing off the fern roots, it means they are clump roots that grow from the center of the fern. Finally, the spreading root system is generally found in Sword fern, originating from the underside rather than the center.
When dividing ferns with rhizomatous roots, ensure each has several leaves and at least one healthy fibrous rhizome root.
If you have ferns with a clumping root system, you can cut them into sections to divide Boston ferns for propagation. In this case, keep the knife between the leaves and over the fleshy crown. Make sure that each division has a section from where roots are originating. If your fern has a spreading root system, you can make it apart using your fingers. First, please ensure each new division has healthy roots and leaves.
Boston Fern Propagation by Dividing
Here is how you can propagate Boston fern by dividing:
- Firstly, find a large, parent Boston fern plant, take it outside, and lay it on the paper. You can also use a tarp or plastic-coated tablecloth to capture the mess.
- The second step is to remove the plant from its pot.
- you will need a pair of forks to divide the root ball in half. However, if you don’t have them, use a sharp knife to slice through the roots.
- Once again, divide the plant root ball into quarters and keep splitting them if each has a crown of foliage with a healthy root mass.
- Once done, re-pot the plants in separate pots or use a large container to place all of them.
- Water them generously so that soil around the roots can settle.
- Finally, ensure your houseplant gets bright but indirect light.
TIP: Always remember that the best time to divide Boston fern for propagation is in the fall or spring. They start losing their leaves once the first hard frost in the fall passes or when they show new shoots.
Propagating Boston Fern by Fern Runners
Boston fern runners may also achieve propagation of Boston fern.
- Firstly, carefully remove the runner from the base of your Boston fern plant using a sharp knife or with a gentle tug.
- Don’t worry whether the offset has roots, as the roots will quickly develop from the part touching the soil.
- If you have removed the offset by hand, plant it immediately. However, if the offset is removed from the parent plant, keep it aside for a few days to let the cut heal or dry.
- plant the Boston fern shoots in sterile potting soil in an appropriate container with drainage holes.
- Also, make sure to plant the shoots deep enough so they remain upright.
- cover the plant with a plastic bag and put it in bright, indirect sunlight.
- Remove the bag and keep it damp Once the offshoot shows signs of new growth.
Concluding Steps: How to Propagate Boston Ferns for Cultivating Healthy Growth in Young Plants
That concludes our guide on how to propagate ferns, specifically focusing on the process for Boston ferns. Once you’ve successfully propagated a Boston fern, it’s time to transition the young plants into a fresh batch of potting soil. Ensure the soil is adequately moistened to support the initial growth stages of your newly propagated ferns.
To foster optimal development, it’s recommended to keep the new divisions, or young plants, in a bright and warm location. Be cautious to shield them from drafts or direct sunlight, especially if you are dealing with delicate climbing ferns or other fern species that are more sensitive to environmental conditions.
As weeks pass, observe your propagated Boston ferns closely. A notable sign of successful establishment is the emergence of creeping rhizomes and a sense of resistance when gently pulling the fern. This resistance indicates that the young plants have taken root, and your efforts to propagate ferns have yielded a flourishing parent fern. By following these guidelines, you can ensure the healthy growth of your propagated ferns, whether they are climbing ferns or other varieties within the diverse world of fern species.
FAQs
How to grow ferns from cuttings?
To grow ferns from cuttings, cut a healthy frond with at least 2-3 leaves, remove the lower leaves and spores, dip the cut end in rooting hormone powder, plant it in a pot with well-draining soil, cover it with plastic to maintain humidity, place it in bright, indirect light, keep the soil moist, and wait for new growth to appear after a few weeks.
What is the effect of propagating ferns from cuttings?
Propagating ferns from cuttings, specifically learning how to propagate ferns from cutting, can have several effects, such as creating new plants that are genetically identical to the parent plant, increasing the number of plants in your collection or garden, and potentially saving money by not having to purchase new plants. Additionally, propagating ferns from cuttings can be a fun and rewarding way to learn about plant propagation and to grow your gardening skills.
How do you propagate ferns from spores?
To propagate ferns from spores, collect mature fronds and let them dry for a few days until the spores are released. Fill a shallow tray or pot with a mixture of peat moss and sand, sprinkle the spores over the surface, cover them with plastic to maintain humidity, and place them in a warm, bright location. Mist the soil mixture as needed to keep it moist and wait for small green plants to appear. Once they grow a few inches tall, transplant them into individual pots or a larger container with well-draining soil.
What are fern fronds used for?
Fern fronds have several uses, both practical and decorative. In some cultures, fern fronds are used as a traditional medicine to treat various ailments. They can also be used as an ingredient in cooking, particularly in Asian cuisine. Decoratively, fern fronds are often used in floral arrangements or as a backdrop for other plants in landscaping. They can also be pressed and preserved for card-making or scrapbooking. Additionally, fern fronds are used in botanical research and education to teach students about plant structure and identification.
How do fern spores work?
Fern spores are reproductive structures that enable ferns to reproduce asexually. These spores are produced on the underside of mature fronds and are typically released into the air when the fronds are mature and dry. Once the spores land in a suitable environment, they can germinate and grow into new fern plants. Fern spores contain male and female reproductive cells, and fertilization occurs when these cells combine to form a new fern plant. This process of fertilization and spore dispersal allows ferns to colonize new areas and spread their genetic material without pollinators or seeds.
Explore the Fern-filled Paradise!
Dive into the world of lush greenery at Houseplant Joy!
Connect with fellow plant enthusiasts, discover captivating content, and find insightful product reviews.
Join our vibrant community on:
Let’s grow together! #HouseplantJoy #GreenThumbCommunity
Boston Fern


