
HousePlantJoy is supported by our audience. When you purchase through one of our links, we may earn a small affiliate commission. As an Amazon Associate I earn from qualifying purchases. Your cost is not affected.
==================
Propagating your oasis is one of the most rewarding ways to expand your indoor plant collection without spending a fortune. You can transform a single plant into a thriving, lush green sanctuary by mastering the simple techniques of growing new plants from cuttings. It’s an exciting process that allows you to watch your plants grow and multiply, bringing new life into your home. Whether you’re a seasoned plant enthusiast or just starting, plant propagation is a fulfilling practice that helps you connect with nature in a hands-on way.
With a bit of patience and a few essential tools, you can create an indoor paradise of your own. From understanding the best methods to using suitable materials, propagation offers endless opportunities to grow various plants. Ready to dive into the art of multiplying your greenery? Let’s explore how to quickly propagate your favorite plants and transform your space into a living oasis.
Expand Your Garden: Simple Steps to Propagate Plants from Cuttings
Growing your plant collection doesn’t have to cost a fortune. With some know-how, propagating your oasis allows you to create new plants from the ones you already have. Propagating plants from cuttings is an easy and cost-effective way to expand your garden or indoor plant collection.
You can make exact copies of your favorite plants by taking small pieces and helping them grow roots. It’s like magic – you start with one plant and end up with many! This method works for lots of common houseplants and outdoor plants, too.
Ready to try it yourself? It’s simpler than you might think. With some essential tools and patience, you’ll be on your way to creating your little plant paradise. Let’s explore how to propagate houseplants and grow your green thumb skills.
Key Takeaways
- Propagating plants from cuttings is a budget-friendly way to grow your indoor garden.
- Many common houseplants can be easily propagated with simple cutting methods.
- Cuttings ensure the new plants maintain the same traits as the parent, providing consistency in your collection.
- Using cuttings reduces waste and promotes eco-friendly gardening by avoiding unnecessary purchases.
Why Choose Plant Cuttings?
Plant cuttings are a great way to grow your indoor garden. You can create new plants just like the parent without spending much money. This method lets you get more of your favorite plants for free.
When you use cuttings, you know exactly what you’re getting. The new plant will have the same traits as the one you took it from, making propagating your oasis even more rewarding. This is perfect if you love and want more of a specific plant.
Cuttings are also a fun way to share plants with friends. You can swap cuttings and grow each other’s favorite plants. It’s like giving a living gift that keeps on growing. Using cuttings is easy and doesn’t need special skills. You can start new plants at home with some essential tools and care. It’s an excellent project for beginners and experts alike.
Cuttings help you save space, too. You don’t need to buy big plants – just start with small cuttings and watch them grow. This is great if you have a small home or limited garden space. By using cuttings, you’re also being eco-friendly. You’re not buying new plastic pots or using extra resources. It’s a simple way to be green while growing your plant collection.
Understanding Plant Propagation Basics
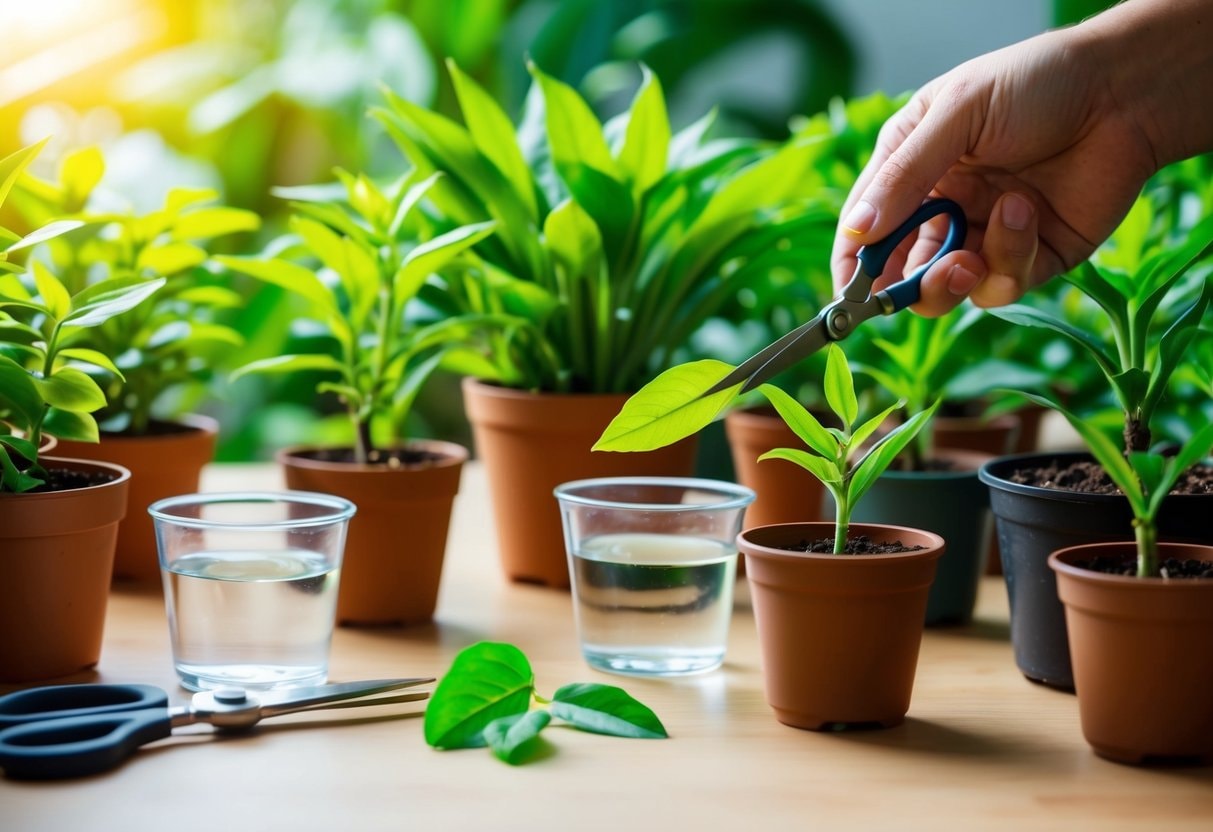
Plant propagation is a fun way to grow your garden. Propagating your oasis allows you to make new plants from existing ones without buying seeds. It’s like magic! There are different ways to do this. Cuttings are a popular method. You snip a piece of a plant and help it grow roots. Here are some common types of cuttings:
To start, pick a healthy plant. Use clean scissors to cut a 4-6 inch piece. Remove lower leaves, keeping only 1-2 at the top.
Next, you need to encourage root growth. You can do this in water or soil. Soil propagation is simple. Just stick the cutting in moist soil. For best results, create a cozy environment. Keep the soil damp and warm. You can cover the pot with clear plastic to trap moisture.
Be patient! It can take a few weeks to see new growth. Once roots form, you can treat it like a regular plant. Remember, not all plants grow the same way. Some are easier to propagate than others. Don’t get discouraged if your first try doesn’t work. Keep experimenting!
Check out this video on the basics of houseplant propagation!
Selecting Plants for Cuttings
Choosing the right plants for cuttings is key to successful propagation, especially when propagating your oasis. You’ll need to consider the type of stem, time of year, and overall health of the parent plant. These factors can make a big difference in your results.
Herbaceous vs. Woody Stems
Herbaceous plants are often easier to propagate from cuttings. They have soft, flexible stems that root quickly. Examples include:
- Pothos
- Spider plants
- Coleus
Woody plants have harder stems and can be trickier. But many still work well for cuttings:
- Roses
- Hydrangeas
- Lavender
Take 4-6 inch cuttings with 2-3 leaves for herbaceous plants. Remove lower leaves, keeping only 1-2 at the top. Woody cuttings may need to be longer, around 6-8 inches.
Seasonal Timing for Cuttings
The best time to take cuttings depends on the plant type. For many plants, spring and early summer are ideal. This is when growth is most active. Some tips:
- Take softwood cuttings in late spring or early summer
- Semi-hardwood cuttings work best in late summer.
- Hardwood cuttings are usually taken in late fall or winter.
Spider plants can be propagated year-round. They often produce “spiderettes” – small leaf clumps perfect for new plants.
Plant Health and Vigor
Always choose a healthy parent plant for your cuttings. Look for these signs:
- Vibrant color
- No pests or diseases
- Strong, new growth
Avoid plants that look weak or stressed. These are less likely to produce healthy cuttings. Take cuttings in the morning when plants are well-hydrated. Use clean, sharp tools to avoid damaging the parent plant or spreading disease.
Proper care after taking cuttings is crucial. Keep them at the right temperature (65-75°F) and humidity. This helps roots form and increases your chances of success.
Tools and Materials Needed
Plant propagation requires a few key items to ensure success in propagating your oasis. You’ll need sharp tools, growth-promoting substances, and a suitable planting medium to give your cuttings the best chance to thrive.
Cutting Implements
You’ll need clean, sharp cutting tools to start your propagation journey. A pair of pruning shears is essential for taking cuttings from woody stems. For softer plants, sharp scissors work well. Make sure your tools are clean to prevent spreading diseases.
Wipe them with rubbing alcohol before and after use. You might also want a clean knife to make angled cuts below leaf nodes. This increases the surface area for root development.
Rooting Hormones
Rooting hormones can boost your success rate when propagating plants. These come in powder, gel, or liquid form. They contain auxins, which stimulate root growth. To use rooting hormone:
- Dip the cut end of your stem in water
- Tap off excess moisture
- Coat the cut end with hormone powder or gel
- Shake off any extra
Be careful not to contaminate the whole container. Pour a small amount into a separate dish for dipping.
Growing Medium
Your cuttings need a unique growing medium to develop roots. A good mix should be:
- Well-draining
- Moisture-retaining
- Sterile
You can buy pre-made rooting mixes or make your own. A simple DIY mix might include:
- 1 part perlite
- 1 part peat moss or coco coir
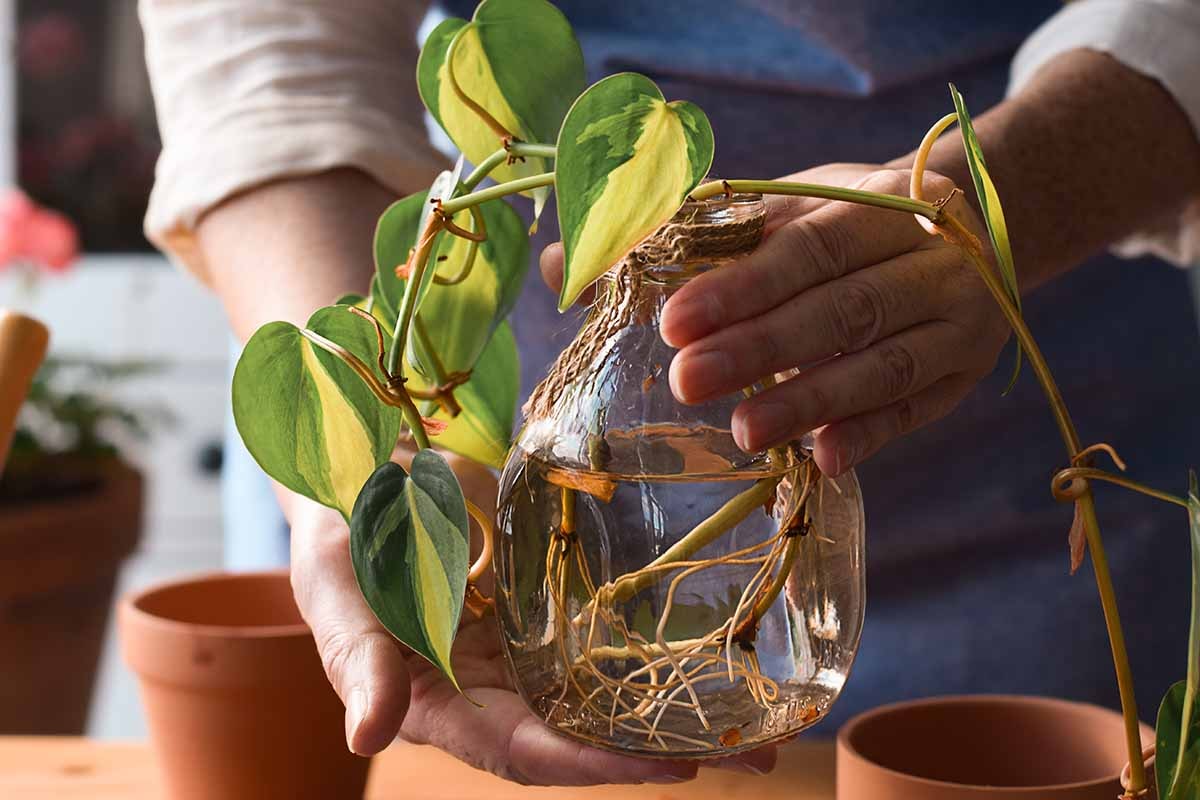
You’ll need clean glass jars or a propagation station for water propagation. These allow you to watch root development. If using soil, small pots with drainage holes work best. This lets excess water escape and prevents rot.
The Cutting Process
Taking plant cuttings is a simple way to grow new plants and is key to propagating your oasis. You can expand your garden or indoor plant collection with the right technique. Here’s how to make successful cuttings and care for them as they develop roots.
Making the Cut
To start, choose a healthy parent plant. Look for new growth that’s not too woody or soft. Use sharp scissors or pruning shears to make a clean cut below a leaf node. Aim for cuttings about 4 to 6 inches long.
Remove leaves from the bottom half of the cutting. This helps prevent water loss and reduces the risk of rot. For larger leaves, you can trim them in half to further reduce moisture loss. Some plants, like begonias, can be propagated from leaf cuttings. Cut the leaf into wedge-shaped pieces, ensuring each piece has a vein.
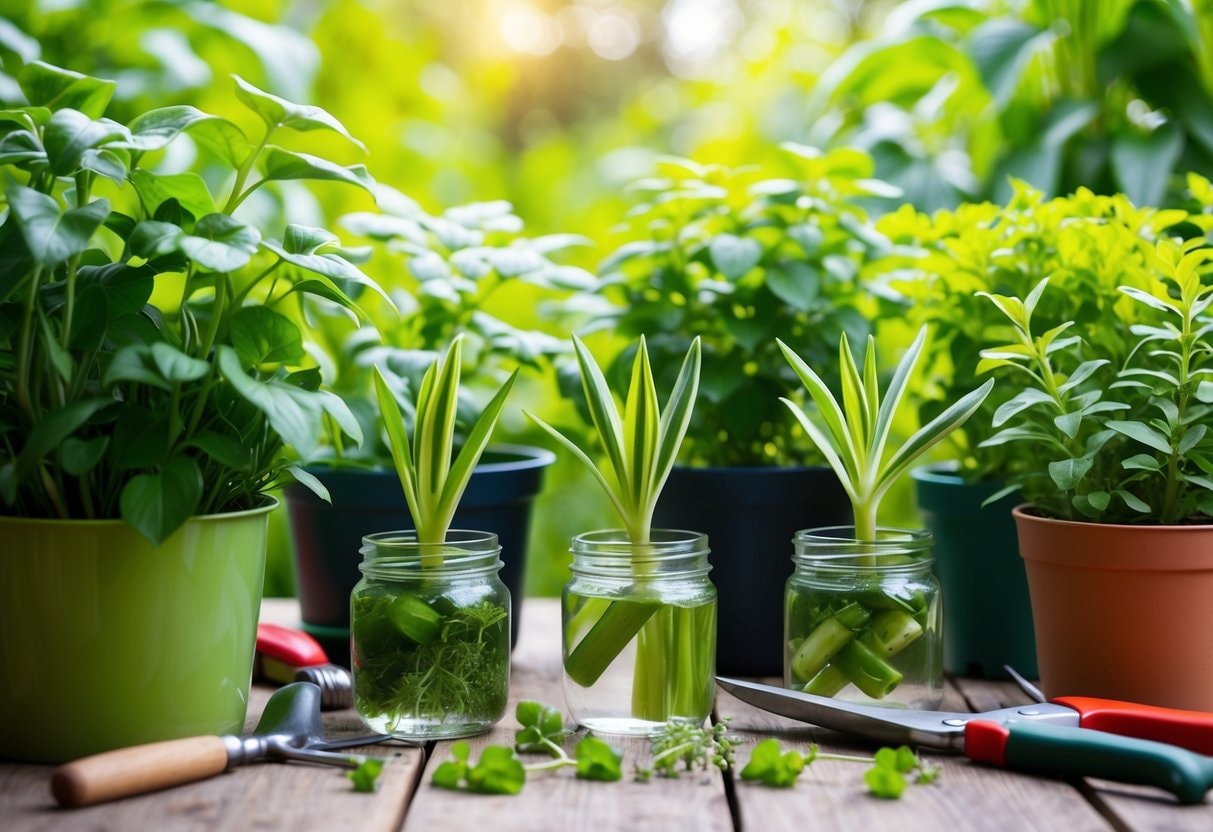
Rooting Methods
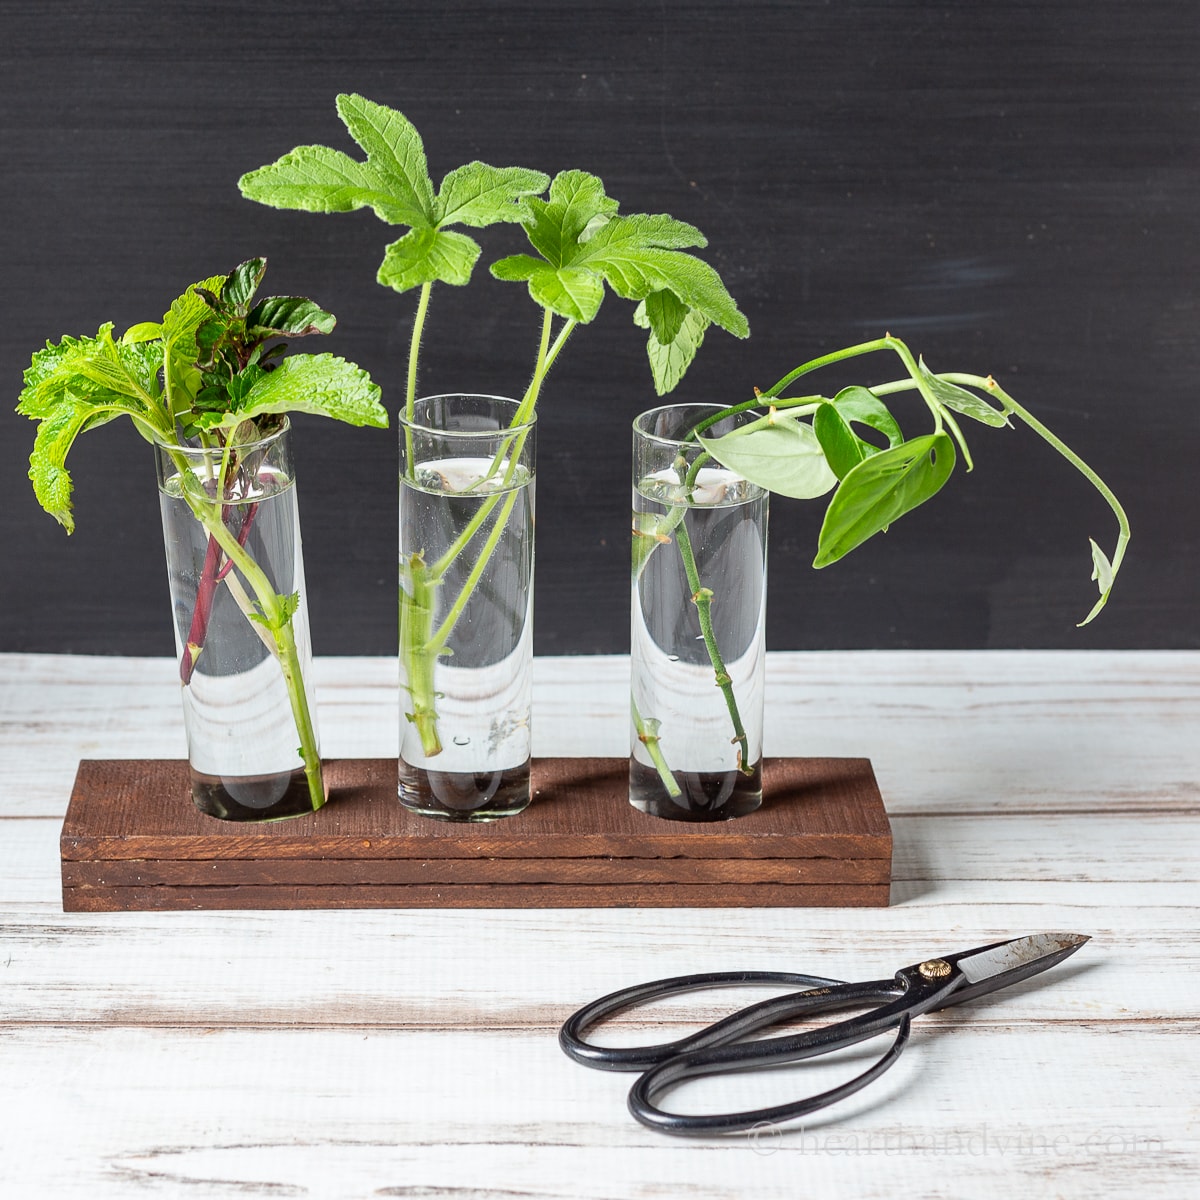
You have several options for rooting your cuttings:
- Water: Place cuttings in a clear container with clean water.
- Soil: Use a well-draining mix of potting soil and perlite.
- Peat and Perlite: A lightweight mix that promotes good aeration.
Dip the cut end in the rooting hormone for soil or peat methods to boost success. Make a pencil hole in the growing medium, then insert the cutting. Keep the cuttings warm and humid. Ideal temperatures are between 65°F and 75°F. You can create a mini greenhouse by covering the container with clear plastic.
Aftercare for Cuttings
Your new cuttings need consistent care to thrive. Keep the growing medium moist but not waterlogged. Mist the leaves regularly to maintain humidity.
Place the cuttings in bright, indirect light. Direct sun can be too harsh for delicate new growth. You’ll know roots have formed when you see new leaf growth or feel resistance when gently tugging the cutting.
Once rooted, gradually expose your new plants to normal conditions. Reduce misting and remove any cover over a few days. After a week or two, you can pot up your new plants and treat them like established plants.
Be patient – some plants root quickly in just a week or two, while others may take several months. With care and attention, you’ll soon have new plants to enjoy or share with friends.
Disease Prevention
Keep your tools clean to avoid spreading infections. Wipe pruning shears with rubbing alcohol before taking cuttings. Remove any dead or diseased parts from the parent plant. Choose healthy cuttings from solid stems.
Look for vibrant leaves and avoid wilted or discolored sections. If you spot any pests, treat the parent plant before taking cuttings. Use sterile potting mix to reduce the risk of fungal growth. You can sterilize soil at home by baking it in the oven at 180°F for 30 minutes. Let it cool before use.
Managing Moisture
Finding the right balance of moisture is key for successful propagation. Avoid overwatering your cuttings, as this can lead to rot. Allow the top of the soil to dry slightly between waterings. Ensure good drainage in your pots.
Add a layer of pebbles at the bottom, or choose pots with drainage holes. Empty any excess water from saucers to prevent waterlogging. If the air is dry, mist your cuttings lightly. You can also cover them with a clear plastic bag to create a mini greenhouse effect. Just be sure to remove the cover daily for air circulation.
Hardening Off
Hardening off helps your rooted cuttings adjust to new conditions. Start by moving them to a sheltered spot outdoors for a few hours each day. Gradually increase their time outside over 7-10 days. First, protect your cuttings from direct sun, wind, and heavy rain. Place them in a dappled shade or use a sheer cloth to filter sunlight.
Water your plants well before and after each outdoor session. This prevents stress and wilting as they adapt to new light and temperature conditions. Keep a close eye on your cuttings during this process. If you notice any signs of distress, like drooping leaves, bring them back inside and try again the next day.
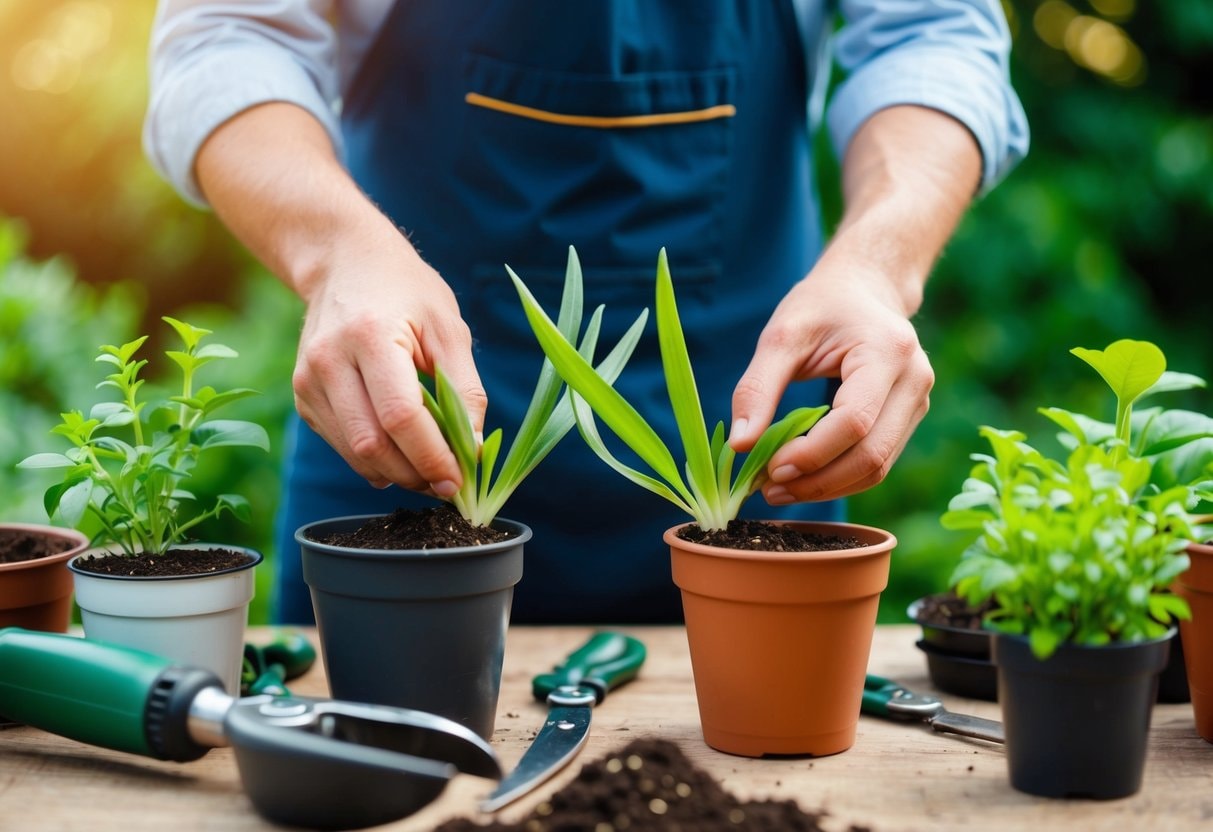
Soil Transition
Choosing the right soil mix is crucial for your newly rooted cuttings. A well-draining potting mix with added perlite or vermiculite ensures good aeration and moisture retention.
When transplanting, gently remove the cutting from its rooting medium. Be careful not to damage the delicate new roots. Place it in a pre-moistened potting mix, firming the soil gently around the base.
Water your newly transplanted cutting thoroughly. Place it in a spot with bright, indirect light for the first few days. Gradually move it to its ideal light conditions over the next week. Keep the soil consistently moist but not soggy. Your cutting may need more frequent watering to establish its root system in the new soil.
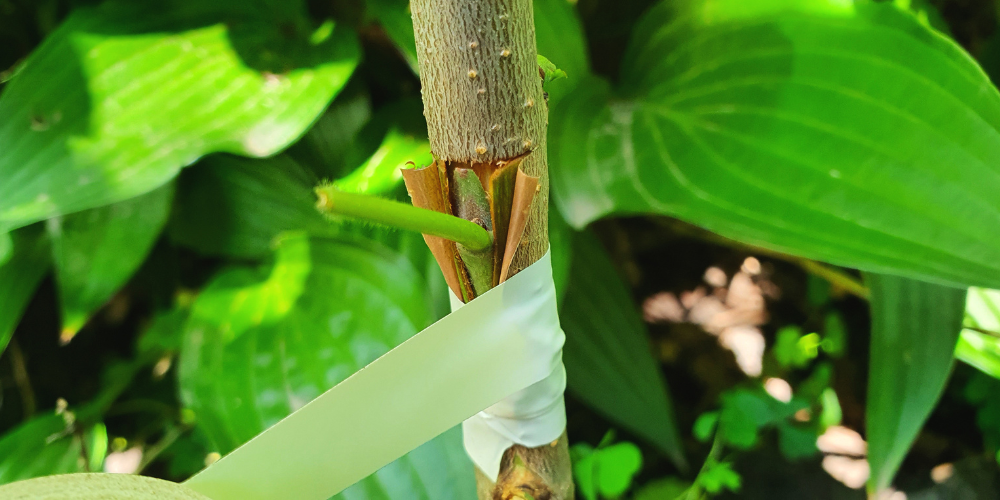
Layering Methods
Layering is a fun way to make new plants while still attached to the parent. You can do this with many climbing or trailing plants. Pick a healthy stem and remove leaves from the middle section.
Make a small cut in the bare area and apply the rooting hormone. Next, wrap the cut part in damp moss and cover it with plastic. Secure both ends with twist ties. Keep the moss moist. In a few weeks, you’ll see roots growing.
Cut the new plant from its parent once the roots are about 2 inches long. Pot it up and watch it grow! This method works great for plants like philodendrons and pothos. It’s a low-risk way to expand your plant collection.
Grafting
Grafting joins parts of two plants to make a new one. It’s like plant surgery! You’ll need a rootstock (the bottom part) and a scion (the top part). Make sure they’re from plants that can grow together. To graft:
- Cut the rootstock at an angle
- Make a matching cut on the scion
- Join the two cuts and wrap them tightly
Use grafting tape to hold everything in place. Keep the plant warm and moist. In a few weeks, the two parts will grow together. This technique is excellent for fruit trees and roses. It lets you combine different varieties on one plant. You can have a tree with multiple types of apples!
Gifting Plants
Giving propagated plants as gifts is a thoughtful way to share your green thumb. Choose healthy cuttings from your favorite plants to create personalized presents. Pot them in cute containers and add a care instruction card.
Your friends and family will love receiving a living gift that keeps growing. Houseplants make fabulous housewarming or birthday presents. Herb cuttings are perfect for cooking enthusiasts. Remember to pick the right plants for gifting. Some easy options include pothos, spider plants, and succulents. These are low-maintenance and root easily from cuttings.
Community Exchanges
Plant swaps are fun events where you can trade cuttings with other gardeners. Look for local gardening groups or community centers that host these gatherings. You can also organize your swap with neighbors or friends.
Bring a variety of cuttings to trade. Label them with the plant name and basic care tips. This helps others know what they’re getting. You might find rare or unusual plants to add to your collection.
Online plant communities are another great way to share. Join social media groups or forums dedicated to plant propagation. You can post photos of your successes and ask for advice. Many people enjoy mailing cuttings to fellow enthusiasts they meet online.
Sustaining Your Oasis
Keeping your plant oasis thriving takes a bit of care and attention. You’ve done the hard work of propagating your oasis and your plants, and now it’s time to help them grow strong and healthy. Water your new plants carefully.
Young cuttings need moist soil, but too much water can cause rot. Check the soil daily and water when the top inch feels dry. Light is crucial for your growing plants. Most cuttings prefer bright, indirect light. Avoid harsh direct sunlight, which can stress new plants.
Feed your plants once they start showing new growth. Use a diluted liquid fertilizer every 2-4 weeks during the growing season. Keep an eye out for pests. New plants can be more vulnerable to insects. Check leaves regularly and treat any issues promptly.
Humidity can make a big difference for many plants. Consider using a pebble tray or small humidifier to increase moisture in the air. Be patient with your new plants. Some cuttings can take weeks or even months to establish strong roots and show significant growth.
Check out this video on how to propagate plants with four methods to master.
From One to Many: Mastering the Art of Plant Propagation
Propagating your oasis through cuttings is a cost-effective way to expand your plant collection and an enjoyable and rewarding experience. As individuals nurture their cuttings, they embark on a journey that deepens their connection with nature. The ability to witness the growth of new plants from just a tiny piece of an existing one is nothing short of magical. Whether looking to fill their home with greenery or share the joy of gardening with friends, this simple yet effective method paves the way for a thriving indoor sanctuary.
By mastering the techniques and principles of plant propagation, anyone can become a skilled gardener, creating a lush oasis from the comfort of their home. The possibilities are endless with the right tools, patience, and care. From bare cuttings to advanced methods like layering and grafting, each step offers an opportunity for growth—both for the plants and the gardener. As one transforms their space into a living haven filled with vibrant life, they contribute to a sustainable and eco-friendly approach to gardening that benefits both their environment and their well-being.
What Are the Most Effective Methods for Propagating Plants From Cuttings?
Is It Possible to Propagate Shrubs From Cuttings, and if So, How?
Can You Plant Cuttings Directly Into the Soil, or is There a Preparation Process?
What Types of Plants Are Best Suited for Propagation Through Cuttings?
What Are the Necessary Conditions for Cuttings to Successfully Take Root and Grow?
Why Become a Part of Our Community?
Gain Unique Knowledge: Access essential tips that will allow your plants to thrive and blossom like never before.
Expert Support: Reach out to our experienced team on platforms like Facebook, Twitter, and more. Our gardening specialists are eager to guide you on your plant journey.
Engage with Fellow Lovers of Plants: Connect with other plant enthusiasts, share your stories, and foster a supportive community. Join us today! Follow Houseplant Joy on Facebook, Instagram, and Twitter for daily inspiration and a thriving plant experience! #HouseplantJoy #GreenThumbsUnite #HouseplantLove
